Showing posts with label Jewelry. Show all posts

Wednesday, May 23, 2012

Summer Hair!


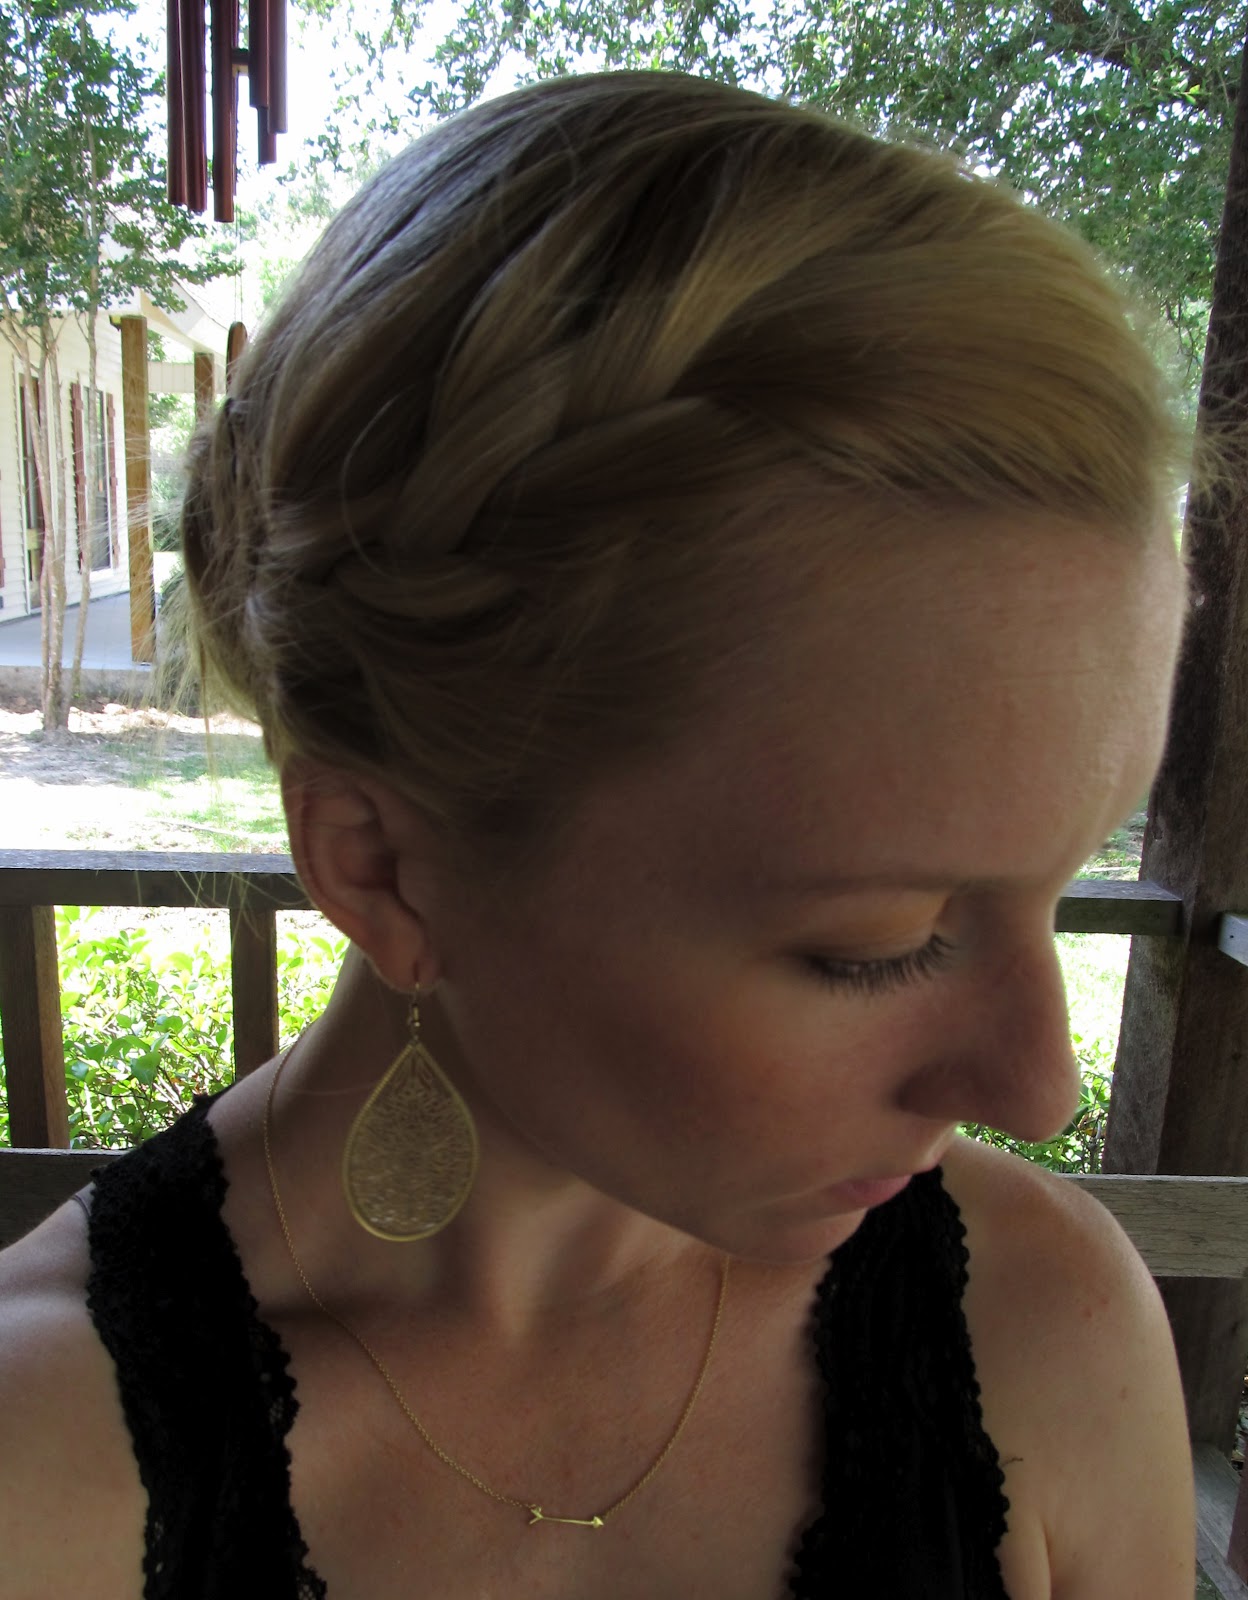
Since my hair is very long, I am always looking for a cute way to keep it off my neck besides a basic ponytail. Luckily all of those hours I wasted on Pinterest actually amounted to something productive: I found a cute and easy way to wear my hair.

Here is the pin on Pinterest that I used!

My earrings are from Premier Designs Jewelry, Gold Lace


Its a little messy, but that is okay!


I know french braiding is intimidating, but braids are so cute for summer hair I just couldn't resist trying them out. 

This hairstyle was very easy and rather quick, I am definitely going to try it out again. I love how the french braids hold back all the layers of my hair and I don't have those annoying flyaways sticking to my face.


Oh and you see the super cute necklace I am wearing? It is called "On the Mark" and its from Stella and Dot. I won the necklace in a blogger giveaway and it is my current go-to necklace a daytime look. I love how simple and light this necklace is, perfect for the summer!



Thursday, May 17, 2012

Tear-Drop Bead with Chain Necklace Tutorial

After my sister found out I was making the Double Tear-Drop Bead Necklace, she sent me pictures of similar necklaces for me to replicate. Since her birthday is coming up, I figured one of these would be the perfect gift for her! 

No worries, she doesn't read my blog so she won't know what the necklace looks like until her birthday :)


Isn't it pretty? She picked out the color, she had a specific outfit in mind she wanted it to match I guess.

Once again, I started out with the acrylic tear-drop beads and this time I added the circular beads. I had to paint all of them so they would be the exact same color, I didn't want to try to match a colored bead to the paint. I LOVED the paint I used this time, it dried much faster and was easier to work with. Plus it was cheaper. I used 2 coats of the acrylic paint and 2 coats of the gloss varnish on everything.

The acrylic paint and gloss varnish I used
After everything dried, I put jump rings on the tear-drop beads. I then strung all the beads on 26 gauge bead wire. It comes on a spool at the store. There are different sizes (gauges) of wire, they vary on thickness. After looking at all my choices of wire, I went with 26 gauge because it would work with my beads and I wanted something thicker in case my sister was rough on her jewelry.

The chain is 16" and I bought it at the same place as all my other supplies. I opened it up to split it into 2 pieces. At one end of each, I placed the respective parts of a 12mm lobster clasp. 


I am trying to show how I looped the wire through the chain before clamping the wire in the small crimp

I then looped the wire around one end of the chain (FYI - the end without the lobster clasp). I used 6mm small crimps to hold both pieces of wire and clamped it tightly around the wire. Then I cut the remaining wire that was sticking out. Repeat this on the other piece of the chain. So now, you have both chains connected by the string of beads!


This necklace was pretty easy for a beginner like me, I am glad I purchased a jewelry tool-kit so I have all the different pliers and stuff.


I hope my sister will like it, what do you think?


Monday, May 14, 2012

Double Tear-Drop Necklace Tutorial

So even though I am back home visiting the rents, I am still crafting a whole bunch. This is my favorite so far:


And guess what? It cost me less than $20 to make! 


I found this on Pinterest and put it on my "to-do" list. Well, when my little sister came in town to visit she was wearing a similar one and she got TONS of compliments. So of course I had to make it!


The original tutorial is found over here at The Morning Letters blog. She did an amazing job at the tutorial! I suggest reading it, she goes into great detail!


Here is what I did in photos:


First, I painted the teardrop acrylic gems. I found them at Hobby Lobby in a packet of 2 for about $2. They are 2 different sizes: one is about 3 inches long and the other is half that size. I painted them in acrylic paint. Since this was my first attempt and I am a perfectionist, I messed up a few times. Good thing about acrylic paint on these gems: You can peel off the paint if you mess up! I ended up painting 2 coats and finding it too clumpy so I peeled it off. The next time, I dipped my brush in water before the paint to thin it out. This worked much better even though I had to apply 3 coats this time. I let them dry one side at a time on wax paper. 

After the acrylic paint dried, I applied 2 coats of a gloss varnish that can be used with acrylic paint. This gave the gems a shiny protective coat.


*These gems are not the easiest to find. I tried Michael's, A.C. Moore, and a few other small craft stores. No luck. Hobby Lobby was the only store BUT I also found them on Amazon!*


After the gems dried, it was time to string them. I bought 1/4 inch ribbon, glass beads, and jump rings (big ones!). I decided the larger gems would be my bottom string and the smaller gems would be on the top string. 
 

After stringing both strands, it was time to tie them together. I wanted to use a larger bead but couldn't find any that matched, so I just used a bead the same size and it worked fine. 


I double knotted the 2 strands together after stringing them through the bead. I tied a knot at both ends. When I wear the necklace I just tie it in a pretty bow at both ends!


I plan on making a variation of this necklace for my little sister's birthday gift. No worries, she knows about it already. I plan on sharing that tutorial too! 


I hope you all enjoyed this tutorial and try it out yourselves, it was very easy for me. This was my first time making any sort of jewelry and it turned out great!